

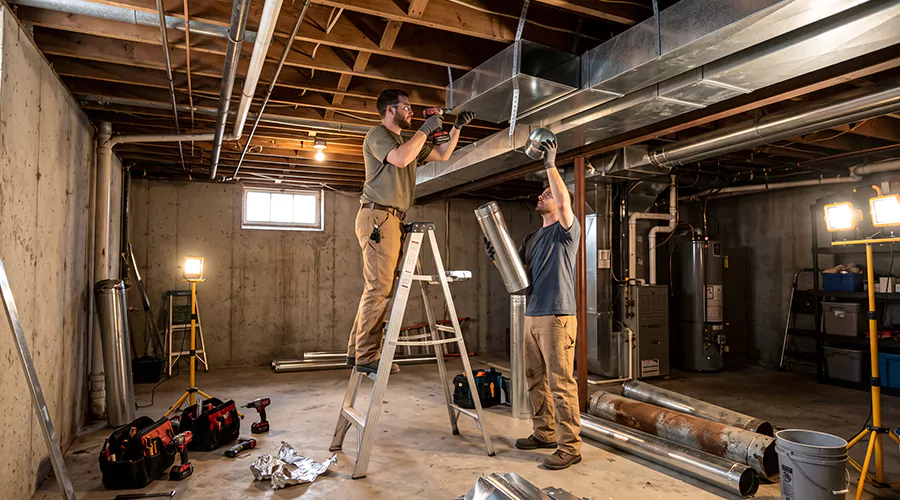
Before replacing old ductwork, determine whether the ducts are actually damaged, whether repairs could restore their performance, and whether the existing system is correctly sized for your heating and cooling equipment. You should also check accessibility, insulation requirements, permit rules, and potential hazards from older building materials. These decisions can substantially affect the cost and performance of the replacement.
Air ducts are responsible for moving conditioned air through a home. Although they are often hidden inside ceilings, walls, attics, or crawlspaces, their condition influences how effectively heating and cooling reach individual rooms. A duct with major leakage or restricted airflow can contribute to uncomfortable temperatures even when the HVAC equipment is functioning normally.
Older ductwork may have problems related to physical deterioration, moisture, or installation methods that no longer suit the home's equipment. However, many older metal ducts remain structurally sound and can continue operating after appropriate repairs. Replacing everything simply because the system is several decades old may result in unnecessary expenses.
The most important preparation involves understanding what is wrong with the current system and what the new installation is expected to improve. A thorough assessment before construction can help avoid repeated repairs, inappropriate duct sizes, and unexpected building work.
1. Old Ductwork Does Not Automatically Need Replacement
Age is only one consideration when evaluating ductwork. A properly installed metal duct can remain serviceable for many years, while a newer flexible duct may develop problems if it has been crushed or inadequately supported. The actual material condition is a more meaningful indicator than the installation date.
Some consumer cost guides describe average ductwork lifespans of roughly 10 to 20 years. However, this should not be treated as a fixed deadline for replacement. The lifespan depends on installation quality, environmental conditions, and maintenance.
Ask a contractor to identify specific failures rather than recommend replacement based solely on age. Ducts that remain airtight, appropriately sized, and structurally sound may continue functioning without major changes.
2. Identify the Signs of Damage
A visual inspection can reveal many reasons a duct system may require replacement. Our air duct camera inspection service can document conditions inside the duct system when visual inspection is not enough. Crushed flexible passages and extensively rusted metal are among the clearest structural problems. Loose connections and damaged insulation should also be documented.
Common concerns include:
- Collapsed or severely kinked flexible ductwork
- Extensive corrosion and holes in sheet metal
- Duct joints that repeatedly disconnect
- Wet or deteriorating insulation
- Confirmed mold contamination of porous duct materials
- Damaged register boots or junction boxes
- Major return-side leakage
- Branches too small for the required airflow
- Persistent damage from moisture or pests
- Numerous defects that make localized repairs impractical
Some household symptoms can point toward these problems but do not confirm them. Uneven room temperatures and weak airflow may also result from filter restrictions or HVAC equipment faults. A contractor should inspect the actual system before recommending replacement.
3. Determine Whether Repair Is a Better Option
Not every duct problem requires new material. A loose connection may be repaired by mechanically securing it and applying an approved sealing product. Small leaks in otherwise sound metal can often be sealed without removing the duct.
More severe defects require a different response. A permanently crushed flexible liner cannot be restored by applying tape. Extensively corroded metal may also lack enough structural strength to support a durable patch.
| Existing Condition | Possible Solution |
|---|---|
| Minor leak at sound metal joint | Secure and seal |
| Loose duct connection | Reattach using approved methods |
| Small area of damaged exterior insulation | Repair insulation and protective covering |
| Sound flexible duct with poor support | Correct routing and supports |
| Permanently crushed flexible duct | Replace affected section |
| Extensive rust or perforation | Replace deteriorated metal |
| Wet or moldy fiberglass duct material | Replace affected material |
| Inadequate duct sizing | Redesign the affected network |
| Widespread structural failure | Consider larger replacement |
Ask the contractor to explain why each proposed replacement section cannot be repaired reliably. A targeted project may solve the original problem at a lower cost than rebuilding the entire system.
4. Have the Entire Duct System Inspected
A duct inspection should consider more than the branches visible in one attic or basement. The main trunks, return system, equipment connections, and register boots should also be evaluated. Damage in one area can affect airflow elsewhere.
For example, a loose return connection can draw air from a dusty crawlspace. A disconnected supply branch can release conditioned air into an attic. Both problems can reduce performance, but their repairs involve different sections of the system.
Ask for photographs of damaged material and measurements when airflow problems are suspected. A camera may help inspect concealed ducts, but airflow and leakage testing provide additional information about system performance. The findings should establish a clear reason for replacement.
5. Check for Air Leakage Before Choosing Replacement
Air leakage is a common source of heating and cooling problems. ENERGY STAR estimates that typical homes lose approximately 20% to 30% of the air moving through ducts because of leaks, holes, and poor connections. However, this does not mean every home requires full duct replacement.
Sealing sound ductwork can often correct significant leakage without installing new ducts. Appropriate HVAC mastic or metal-backed closure materials can be used on suitable connections. Mechanical fastening must also be corrected where sections have become loose.
Duct leakage testing can help determine whether a system has substantial openings. A professional should interpret those results alongside a physical inspection. Replacement becomes more justified when the material itself cannot support a lasting repair.
6. Evaluate Supply and Return Airflow
The supply and return networks must work together. Supply ducts deliver conditioned air into rooms, while return ducts carry air back to the blower. A restrictive return system can affect the performance of otherwise sound supply branches.
Some older homes have inadequate return capacity or use unsealed building cavities as return pathways. These arrangements can contribute to unwanted air entry and pressure differences between rooms. Replacing supply branches alone may not correct the underlying issue.
Ask the contractor to evaluate the complete airflow path. Measurements of system static pressure and selected register airflow can help identify restrictions. Any proposed redesign should account for both sides of the air distribution system.
7. Do Not Assume the Original Duct Sizes Are Correct
One of the most important questions before replacement is whether the original system was properly sized. Some older installations contain branches that are too small or routed through restrictive bends. Replacing them with identical new material can leave the same comfort problems.
Duct sizing depends on the equipment's airflow requirements, room heating and cooling loads, duct length, and pressure losses through fittings. ACCA Manual D provides recognized residential duct design methods. Where necessary, ACCA Manual J load calculations can help establish the room conditions the distribution system needs to serve.
A contractor should explain whether the project is a like-for-like replacement or a redesigned system. If the original ducts were inadequate, the new layout should correct that problem.
8. Consider Your Existing HVAC Equipment
Ductwork should match the blower and capacity of the connected heating and cooling equipment. A home may retain its existing furnace or air conditioner while replacing damaged ducts. However, the duct design should also consider any equipment upgrade planned for the near future.
A replacement HVAC unit may have different airflow requirements. If ducts are changed without reviewing those requirements, another modification might become necessary after equipment installation. Coordinating the work can reduce repeated labor when both projects are justified.
The contractor should not automatically recommend a larger HVAC unit to compensate for poor duct performance. Air leakage or restrictive branches may be responsible for comfort problems. Correcting the distribution system can be a more appropriate solution than increasing equipment capacity.
9. Choose the Right Duct Material
Residential systems commonly use rigid metal ducts, insulated flexible ducts, and approved fiberglass duct products. Their suitability depends on the duct's function and installation environment. The lowest-cost material is not automatically the best option for every part of the system.
| Duct Material | Common Use | What to Consider |
|---|---|---|
| Galvanized sheet metal | Main supply and return trunks | Durable, requires fitted and sealed joints |
| Insulated flexible duct | Suitable branches | Vulnerable to compression and poor support |
| Fiberglass duct board | Selected trunks and plenums | Sensitive to moisture damage |
| Internally insulated duct | Specialized applications | Requires material-specific maintenance |
| Approved rigid duct products | Restricted or specialized locations | Must satisfy code and product requirements |
Flexible ductwork is useful when gentle bends are needed, but excessive length and sagging can increase airflow resistance. Rigid metal often works well for major trunks and passages requiring a stable shape. The design may use different materials in different parts of the system.
The contractor should document the proposed material specifications. This helps homeowners understand what they are purchasing and what future maintenance may involve.
10. Pay Attention to Insulation and Duct Location
Ducts located outside conditioned space can experience significant temperature differences. An attic may become very hot during summer, while a crawlspace can be cold or damp. Insulation reduces unwanted heat transfer between the air in the duct and its surroundings.
The required insulation rating depends on the duct location, the adopted energy code, and other installation conditions. A contractor should identify whether the quoted ducts are pre-insulated or require separate insulation. Connections and fittings must receive suitable coverage as well.
Moisture control is another consideration. Damaged vapor barriers or exposed insulation may contribute to condensation in humid conditions. Replacing ducts without restoring appropriate insulation can create avoidable problems.
11. Examine Attic, Basement, and Crawlspace Access
The location of old ductwork can substantially affect replacement cost. Exposed basement ducts are often easier to remove and install than passages hidden inside finished ceilings. Attics and crawlspaces may introduce limited clearance and working hazards.
An attic may lack safe walking surfaces, while a crawlspace can contain standing water or exposed electrical wiring. Contractors should evaluate these conditions before estimating labor. Dangerous access should be corrected or managed before demolition begins.
Finished walls and ceilings can also require restoration after ducts are replaced. The quote should explain whether opening and repairing these surfaces is included. An inexpensive duct installation price may not reflect the complete construction cost.
12. Check Older Insulation for Potential Hazards
Before removing old ductwork, identify materials that may require special precautions. Some older duct wrapping and building insulation can contain asbestos. The EPA advises that suspected asbestos-containing material should be left undisturbed until qualified assessment and any necessary specialized handling are arranged.
Asbestos cannot reliably be identified by appearance alone. A homeowner should not cut into old wrapping to obtain a sample. Sampling and disturbance should be handled by appropriately trained professionals when needed.
Potentially hazardous materials can change the replacement schedule and cost. These concerns are best identified before demolition rather than after the ductwork has been opened.
13. Resolve Moisture and Pest Problems First
Replacing ducts damaged by water without correcting the source of moisture can lead to another failure. Roof leaks, plumbing leaks, and crawlspace drainage problems may need attention before new materials are installed. The appropriate solution depends on the building and the location of the ducts.
Wet fiberglass duct materials require particular care. The EPA advises that wet or moldy fiberglass duct insulation generally cannot be effectively cleaned and should be replaced. The underlying moisture problem must also be corrected.
Pest damage presents a similar issue. New flexible ducts can be damaged again if animal access points remain open. Pest removal and appropriate cleanup may be necessary before installing replacement sections.
14. Understand the Cost of Duct Replacement
Published U.S. cost guides report varying duct replacement prices because they include different project sizes. HomeGuide estimates $1,400 to $5,600 for many residential replacement projects and approximately $25 to $55 per linear foot. Angi's 2026 dataset reports a lower average for its broader mix of replacement jobs.
These figures should be treated as planning references rather than guaranteed local prices. Replacing one accessible branch is much less involved than rebuilding a complete concealed duct network. Materials, labor, design changes, and building repairs all affect the total.
Possible additional expenses include permits, duct insulation, drywall restoration, old material disposal, and specialized contamination assessment. Ask which of these services are included in the contractor's total before comparing estimates.
15. Decide Whether to Replace the Whole System
A complete replacement is not always the most economical response. If one flexible branch has collapsed but the remaining ducts are sound, replacing that branch may be sufficient. A project involving several damaged ducts can also retain suitable main trunks and return passages.
Whole-system replacement becomes more reasonable when deterioration is widespread or the existing design cannot provide the required airflow. The contractor should identify the condition of every major component before making that recommendation.
Ask for two alternatives when practical. One quote can cover necessary localized repairs and replacements, while another can describe a broader redesign. Comparing the scope and expected performance helps make the decision clearer.
16. Check Permits and Building Requirements
Significant duct replacement may require a mechanical permit or inspection. The rules vary by jurisdiction and can depend on whether the work involves simple repairs or extensive changes to the distribution network. A qualified contractor should verify the requirements before construction begins.
Duct insulation, sealing, support, and leakage testing may be subject to adopted mechanical and energy codes. Replacement work may also pass through fire-rated ceilings or walls that require suitable restoration. The project should not weaken structural members to create a more convenient duct route.
Ask whether permit applications and inspection charges are included in the quote. Missing approvals can create problems later, particularly when the home is sold or additional HVAC work is performed.
17. Ask How the New Ducts Will Be Sealed and Supported
Proper connections are an important part of duct performance. Metal joints should be mechanically secured, while flexible inner liners require approved fastening to suitable collars. Appropriate HVAC mastic and listed closure products can then be used to seal the joints.
Ordinary cloth-backed duct tape is not a reliable permanent duct seal. ENERGY STAR recommends suitable mastic or metal-backed tape for appropriate applications. The contractor should explain the chosen connection method before installation begins.
Flexible duct supports also matter. Department of Energy guidance generally recommends wide straps no more than four feet apart, with limited sag between supports. Excessive compression can reduce airflow and damage insulation.
A new duct system should not contain the same unsupported loops and loose connections that contributed to the original failure.
18. Plan for Airflow and Leakage Testing
A replacement project should include verification that the new system works as intended. A duct leakage test can identify openings remaining at fittings and connections. Airflow and static pressure measurements can help determine whether the new layout is restrictive.
Visual inspection alone cannot confirm every aspect of performance. A duct can appear correctly installed while delivering less air than required. Testing provides an opportunity to correct these problems before the work area is closed.
In homes containing naturally vented fuel-burning appliances, changes to duct leakage and building pressure may also require combustion safety evaluation. The contractor should account for these conditions during the final checks.
19. Compare Contractors Using the Same Work Scope
The cheapest quote is not always the least expensive completed project. One contractor may include insulation and leakage testing, while another may quote only material and installation labor. Comparing totals without examining exclusions can be misleading.
Ask for a written proposal that identifies the ducts being replaced and the materials to be installed. It should state whether design work, permits, demolition, insulation, and testing are included. The contractor should also explain how any unexpected damage will be handled.
Consider the company's experience with the installation location. Replacing ducts in a finished older home presents different problems from installing exposed ducts in a new building. Relevant experience can help reduce avoidable changes during construction.
20. Know What a Complete Replacement Quote Should Contain
A useful written estimate gives enough information to understand the finished installation. General wording such as new ductwork throughout the house leaves many important details unanswered. The quote should identify both the work and how its performance will be checked.
Before signing, confirm:
- The reason for each proposed replacement section.
- Which existing ducts will remain.
- The new duct sizes and design method.
- The supply and return systems included.
- The type and insulation rating of the new ducts.
- The approved connection and sealing methods.
- Duct support arrangements.
- Old duct removal and disposal.
- Permit and inspection responsibilities.
- Any drywall or ceiling restoration.
- The planned leakage and airflow tests.
- The expected schedule and equipment downtime.
- The warranty on materials and workmanship.
- How unforeseen work will be priced and approved.
This information makes it easier to compare contractors fairly. It also provides a reference for checking the installation after completion.
How Long Does Old Ductwork Replacement Take?
Many accessible residential replacement projects take approximately one to two working days. However, a major retrofit in a finished older house can require additional time for demolition, custom fabrication, and surface restoration. Specialized material assessment may also affect the schedule.
The contractor should explain when heating or cooling will be unavailable. Installation and testing should be coordinated so the system is not operated with major ducts disconnected. The project is complete only when the distribution network has been restored and checked.
A shorter installation time is not automatically better. Proper sealing and airflow verification are important parts of the work and should not be omitted simply to finish sooner.
Is Replacing Old Ductwork Worth the Investment?
Replacement can be worthwhile when the existing ducts are extensively damaged or incorrectly designed. Correcting major leaks and restrictions may improve room comfort and reduce unwanted energy losses. However, the benefit depends on the original defects and the quality of the finished installation.
Sound older ducts can often remain in service with limited repairs. Replacing them unnecessarily may provide little improvement. The better investment is the work that addresses documented problems and restores appropriate airflow.
Conclusion
Before replacing old ductwork, establish whether the existing system needs repairs, selected replacements, or a complete redesign. Check airflow requirements and duct condition rather than relying on age alone. Older insulation, access restrictions, permits, and moisture problems should be evaluated before removal begins. The finished installation needs suitable support, sealing, insulation, and performance testing. Request a documented assessment and comparable written quotes before approving substantial replacement.